How to set up and use prepaid credits in your system.
Overview
This feature allows your customers to buy credits in advance and to use them later, either to order new services or to pay renewal invoices automatically. Prepaid credits can also be added to the customer’s balance by converting overpayments or refunds to credits in the Admin Panel.
Before you begin
At least one product of the type Prepaid Credit is required in order for this feature to work. Atomia Billing comes with the predefined product CRD-PREPAID, which can be used as the default prepaid credit product. If it is not, a new product needs to be created for this purpose.
Configuring prepaid credit products using the predefined product
If you use the predefined prepaid credit product CRD-PREPAID, you can edit prices and names to suit your needs as follows:
- Go to Admin Panel > Products.
- Search for CRD-PREPAID and click on its article number to edit it.
- Check the names and descriptions and update them if needed.
- Check existing prices and add prices in desired currencies.
- Click Save to store the new values.
Configuring prepaid credit products when not using the predefined product
In case you don’t want to use the predefined product, or if you want to add additional prepaid credit products, proceed as follows:
- Go to Admin Panel > Products.
- Click on Add new product.
- Fill in the product details. Make sure that the following properties are set correctly:
- Provisioning service: None
- Product category: Prepaid credit
- Type of billing: Fixed/Non-recurring
- Add prices in desired currencies.
- Click Save to create a new product.
Enabling the Prepaid Credits payment method
The payment method for Prepaid Credits is pre-configured out of the box. It only has to be enabled and allowed for the desired resellers.
- Go to Admin Panel > Settings > Plugin configuration.
- Click on the Other Plugins tab.
- Find the plugin Payments: Prepaid Credits and verify that it is enabled (green icon). If it is not, enable it by clicking the Enable button.
- From the menu, select Settings > Reseller configuration.
- Find the desired reseller and click on its number to edit it.
- At the bottom of the page, find Available payment methods and select AtomiaCredit while holding Ctrl/Command key on your keyboard (for multi-selection).
- Click Save to store the updated settings.
- Repeat steps 4-7 for all resellers that should support prepaid credits.
Using prepaid credits
Billing API supports two models for using prepaid credits:
- Discount invoices fully. When a customer orders new services and selects prepaid credit as the payment method, the created invoice is discounted and issued as paid with zero amount. The customer’s prepaid credit balance is reduced by the paid amount. The same happens when a renewal invoice is issued. With this model, it is not possible to pay existing invoices with prepaid credits.
- Use prepaid credit as a regular payment method. Prepaid credits are used just like any payment method. This means that the invoice is issued without any discounts and then paid with Atomia Prepaid Credits payment method, with the payment recorded. This model allows paying existing invoices with prepaid credits.
Configuring Billing API
Using prepaid credits as a discount is the default model in Atomia, and it is enabled without any additional configuration. If it is the model you want to use and if you have created at least one prepaid credit product, you are good to go without any further configuration.
To fine tune how prepaid credits are used in Atomia, proceed as follows:
- Find your Atomia Billing API installation folder. It is usually located in:
C:\Program Files (x86)\Atomia\BillingAPIs\BillingApi - Open the web.config file in your text editor.
- Find the prepaidCredit element and set its properties to the desired values (check explanation of properties below).
- Save the file to make the changes active.
The configuration options are:
- overpaymentItem – States the article number of the item to be used when an overpayment amount is converted to the prepaid credit. If the item is not found, the first prepaid credit item is used.
- payWithCreditsItem – States the article number of the item to be used when an invoice is discounted with credits. If the item is not found, the first prepaid credit item is used.
- createOverpaymentInvoice – States if the invoice should be issued for an overpaid amount, which is converted to credits.
- discountInvoicesPaidWithCredits – States how prepaid credits are going to be used. When set to
true, the discount invoices with credits model is used. Otherwise, prepaid credits is used as the payment method.
Paying existing invoices with prepaid credits
It is only possible to pay existing invoices with prepaid credits when discountInvoicesPaidWithCredits is set to false.
Paying invoices through Billing Customer Panel:
- Find your Atomia Billing Customer Panel installation folder. It is usually located in:
C:\Program Files (x86)\Atomia\BillingCustomerPanel - Open the App_Data folder.
- Open the appConfig.config file in your text editor.
- Find the AllowPrepaidCreditInvoicePayment global setting key and set its value to
true. - Save the file to make changes active.
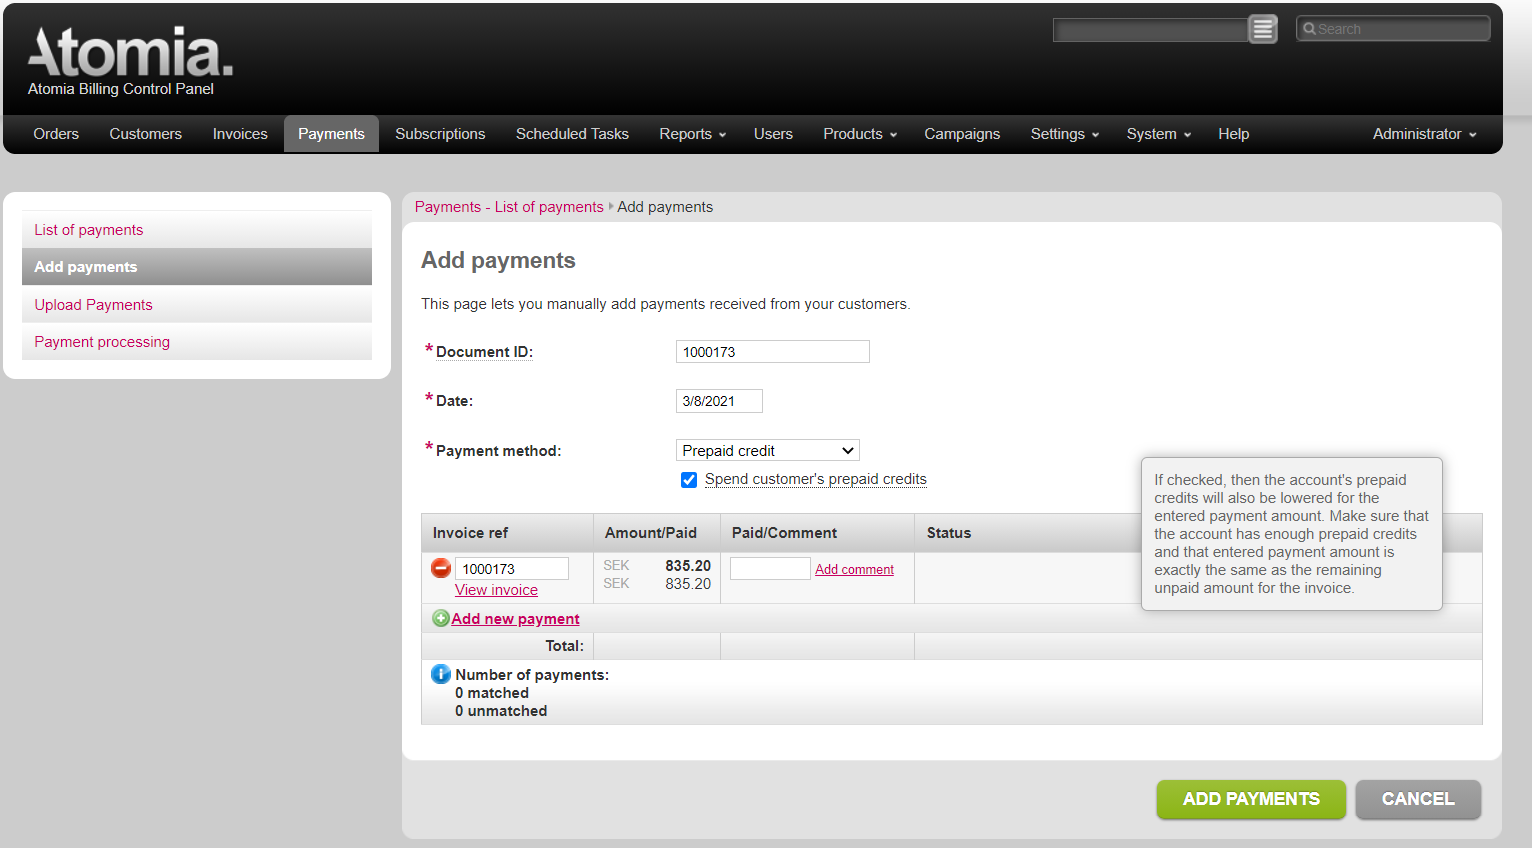
Paying invoices through Admin Panel:
- Find your Atomia Admin Panel installation folder. It is usually located in:
C:\Program Files (x86)\Atomia\AdminPanel - Open web.config file in your text editor.
- Find the spendCustomersPrepaidCredits app setting key and set its value to
true. - Save the file to make changes active.
- When you select payment method PrepaidCredit at Admin Panel/Payments/Add page, you will have an option whether to spend customer’s prepaid credits or not.
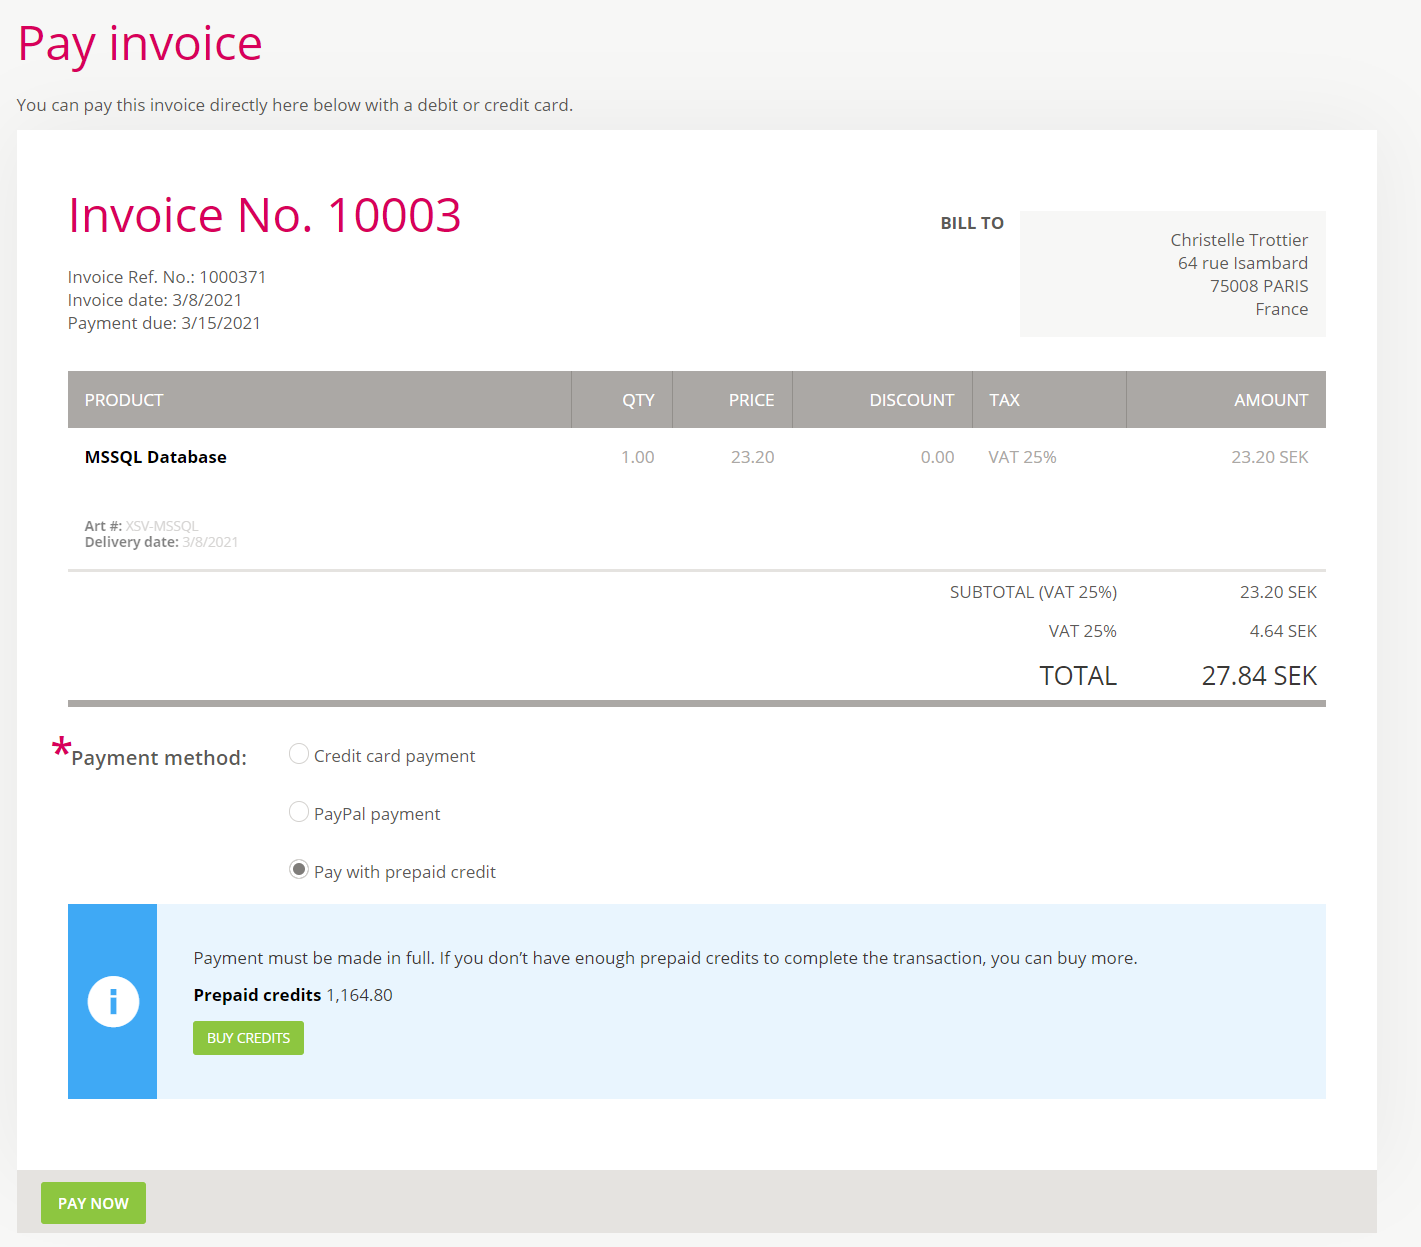
Show Prepaid balance in Billing Customer Panel
By default, the Billing Customer Panel does not show a prepaid credit balance. To enable this feature, follow the next steps:
- Find your Atomia Billing Customer Panel installation folder. It is usually located in
C:\Program Files (x86)\Atomia\BillingCustomerPanel - Open the App_Data folder.
- Open the appConfig.config file in your text editor.
- Find the PrepaidCreditPaymentEnabled global setting key and set its value to
true. - Save the file to make changes active.
After changing, prepaid credit balance should be shown as on the picture below:


