Overview
The integration overview of Patchman.
Before you begin
The Patchman integration requires that your patchman-client runs on Linux OS (CentOS, Red Hat Enterprise Linux and Ubuntu Linux). Both 32-bit and 64-bit systems are supported.
The following minimum operating system versions are supported:
| OS | minimal supported version |
| CentOS/RHEL | 7 |
| Ubuntu | 16.04 (Xenial) |
Recommended: Ubuntu 18.04
Installation and configuration
This section guides you through setting up the integration. There are three places where installation/configuration is needed. The first one is Patchman portal, the second one is the server where patchman-client is installed, and the third one is Atomia system.
Set up patchman portal
To setup patchman portal, you’ll need to:
- Go to Patchman portal, and login with your credentials
- Click on Servers dropdown menu (under Management section) and go to Add server

On this page you can find the instructions for installing the Patchman Agent on your local machine:
- Log in as a superuser on the system on which you would like to install Patchman and execute the following script:
wget https://download.patchman.co/install-patchman.sh && /bin/bash -e install-patchman.sh && rm -f install-patchman.sh
This script will add the Patchman repository to your package manager, install the Patchman agent and start the Patchman daemon.
- During installation, the script will ask you for your licence key which you can find on the “Add server” page. After entering the key, the server will request and set up a license for your server and start connecting to the Portal. If this key is compromised, you can revoke it and generate a new one.
- When the installation is completed, you need to verify installation. In the “Add server” page you can find a button called “Verify addition”. When you click this button, the Portal will check if it can connect with your server. Once you have verified the process went well, your first server has been added successfully!
Connect Patchman Agent with Atomia
After successfully creation of the server, execute the following command on the command line as a superuser (on the same server where patchman client was installed):
Ubuntu 16.04 or higher:
If you don’t have apt.atomia.com enabled as a repository on your server, run the following command:
wget -q -O - http://apt.atomia.com/setup.sh.shtml | sed s/%distcode/`lsb_release -c | awk '{ print $2 }'`/g | sh
Install the required package:
apt-get install atomia-patchman-integration
CentOS/RHEL 7:
If you don’t have rpm.atomia.com enabled as a repository on your server, run the following command:
rpm -Uhv http://rpm.atomia.com/rhel7/atomia-repository-setup-1.0-1.noarch.rpm
Install the required package:
yum install atomia-patchman-integration
Atomia system
Automation server
Setting up Automation server consists of adding a resource to the Resources.xml file and setting up which provisioning packages should have Patchman support. Atomia – Patchman integration has been achieved through a module called Security module.
Adding a resource
All resources are in the Resources.xml file. There is already a binding for module Atomia.Provisioning.Modules.Security.Security, with commented out example resource configs.
Example config:
<bindings>
    <moduleList>
        <module name="Atomia.Provisioning.Modules.Security.Security" resourceAsignmentPolicy="RoundRobin" />
    </moduleList>
    <resourceList>
        <resource name="Security">
            <property name="ClientId">O8662I1Yov1zuDh4Tsvpz7cAQWEdasJz3JLMG6EtHivis5</property>
            <property name="ClientSecret">IP71k1QYvDcmSvOoQhlR3KkkljasldkjPwpdDvmPDmOqfvmm9ga3FcmdTJMQKab4rrdjqMFNIZMlGXs8L7DlHXe83WX0UDqa8sdJKTFbXmGxaXvTz684Le3AeN0KdlfwMT6</property>
            <property name="Suborganization">1</property>
            <property name="ApiEndpoint">https://portal.patchman.co/api/v1/</property>
            <property name="TokenEndpoint">https://portal.patchman.co/oauth2/token/</property>
        </resource>
     </resourceList>
</bindings>
Properties explanation:
- ClientId – Your client ID you received through the Portal web interface. (Public key)
- ClientSecret – Private key for Application-only authentication received through the Portal web interface.
- Suborganization – This property is optional and represents a sub-organization id which can be found on the Patchman portal if a customer has defined sub-organization under the Company section on the Patchman portal. It should be omitted if there are no defined sub-organizations.
Rest of the properties (that end with “Endpoint”, e.g. “ApiEndpoint”) are URLs to different API endpoints and can stay like in the example.
Setting up packages
For every package (E.g Premium, Gold package) that should support Patchman in <packageDescription> in the ProvisioningDescription.xml file, it’s needed to do the following steps:
- Inside Complex Service “CsBase”, in PartList section append this code:
<partService name="Security" min="0" max="1">
    <propertyTransformation>
        <simpleTransformer>
            <serviceProperty name="AccountId">
                <expression>$CsBase::PackageNumber+#Account()</expression>
            </serviceProperty>
        </simpleTransformer>
     </propertyTransformation>
</partService>
- Inside package in section ServiceLimitation > GroupLimitation append this code:
<group maxCount="1">
    <service name="Security" />
</group>
- If you want, you can add this service automatically inside Init section of selected package. You need to append this code:
<add partName="Security" />
Billing API
Scheduled tasks
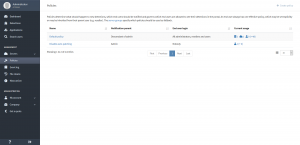
There are two scheduled tasks related to Patchman integration: Account Frequent Check and Account Suspension. Turning the tasks on and specifying how often to run is done in Atomia Admin panel > Settings > Scheduled task settings page.
Account Frequent Check and Account Suspension plugin configuration
These tasks have the same configuration. Configuration can be set up in Admin panel > Settings > Plugin configuration page. To add or edit the configuration, press the button configure next to SecurityAccountFrequentCheckScheduleEventHandler or SecurityAccountSuspensionScheduleEventHandler.

The button opens the configuration page. The configuration has the following fields:
- Interval – Interval for checks in hours / Interval for suspending accounts which have been identified to be infected with specific malware and are not cleaned after that interval expires
Account Frequent Check
Full name of this task is SecurityAccountFrequentCheckScheduledEventHandler. It fetches and triggers a scan of Atomia storage through Patchman agent.
Account Suspension
Full name of this task is SecurityAccountSuspensionScheduledEventHandler. It will suspend an Atomia account if certain criteria are met. E.g. if an account is identified to be infected with a specific malware and is not cleaned up after x hours/days the application triggers the suspension of the account and sends a report to specified recipients.
IMPORTANT – To use this scheduled task, root reseller should have a security service under CsBase which can be added via Atomia Automation Client.
Pages in Hosting Control Panel
Security
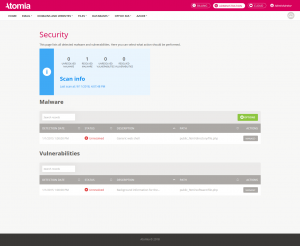
This page has two sections. The first section shows scan information about some statistic data, like resolved/unresolved malware and vulnerabilities. Also, we can see last scan time for our web storage. All this data is fetched from the Patchman portal, which we will see later.
The second part of this page has two tables which have information about malware and vulnerabilities. We can see detection time, type of malware/vulnerability, the location of the malicious file, and a dropdown button which has available actions for the current file (these actions come from Patchman portal).
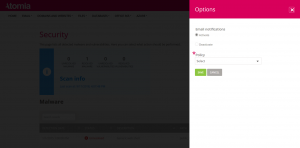
Also, we have the option button which gives us some functionalities to configure personal settings. There are two options which can be configured.
We can enable or disable email notifications, also, we can set policy for our account. Of course, we have complete control of these policies. We can change these policies on Patchman portal, directly.
Policy info customization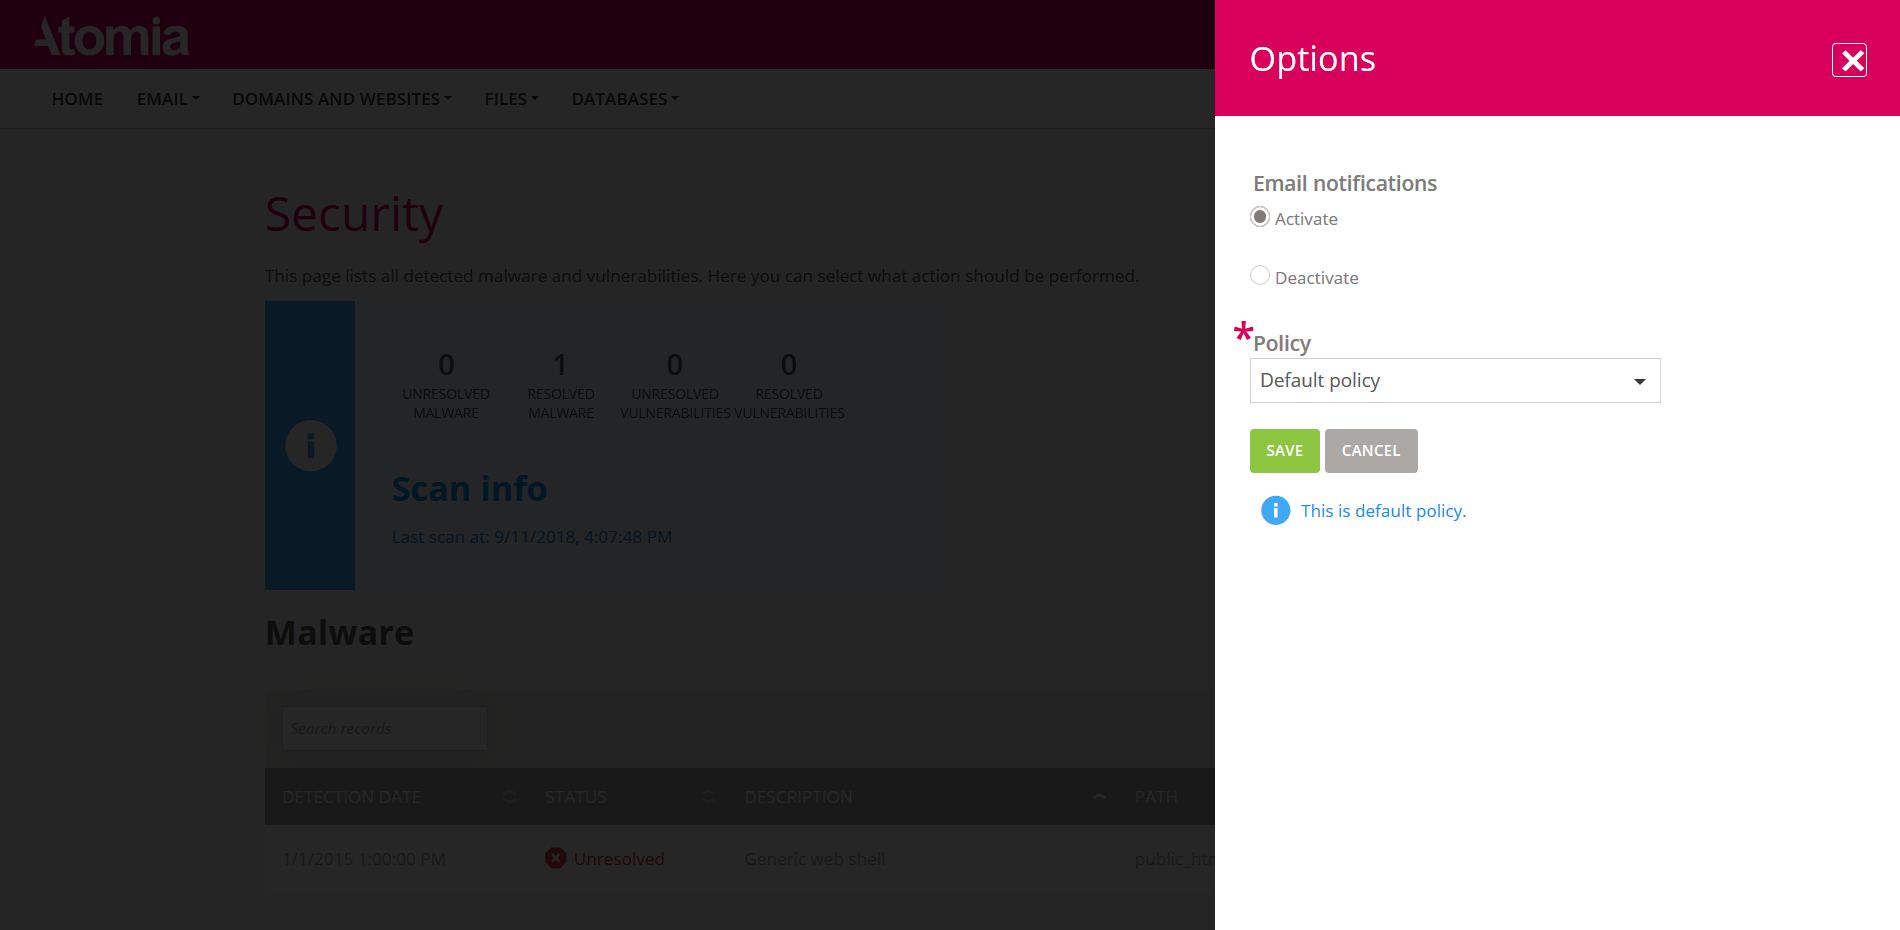
If you want to change policy info text in security option modal, you should provide translate for the desired language and set property “Policy_number” where the number is policy ID which can be found on the patchman portal or by visiting API endpoint (last number in the url property represent policy id). E.g. :
<data name="Policy_1" xml:space="preserve">
    <value>This is default policy.</value>
</data>
<data name="Policy_2" xml:space="preserve">
    <value>This is auto-patching policy.</value>
</data>
Also, you have to set value for property “PolicyNumber”, where the value represent ids of all policies on the patchman portal. This property can be found in file:
HostingControlPanelbinAtomia.Web.Plugin.Website.dll.config.
<pluginSetting name="PolicyNumber" value="1,2"/>