How to set up two-factor authentication in Atomia.
Overview
Two-factor authentication or 2FA is a security process in which the Atomia user needs to do a second step after entering his password to verify it’s him signing in. The user has to login with the username and password, and provide another form of authentication that he has access to or only he knows. 2FA adds an extra security layer to the authentication process by making it harder for attackers to gain access to the user account because knowing user credentials is not enough to pass the authentication check process.
How it works
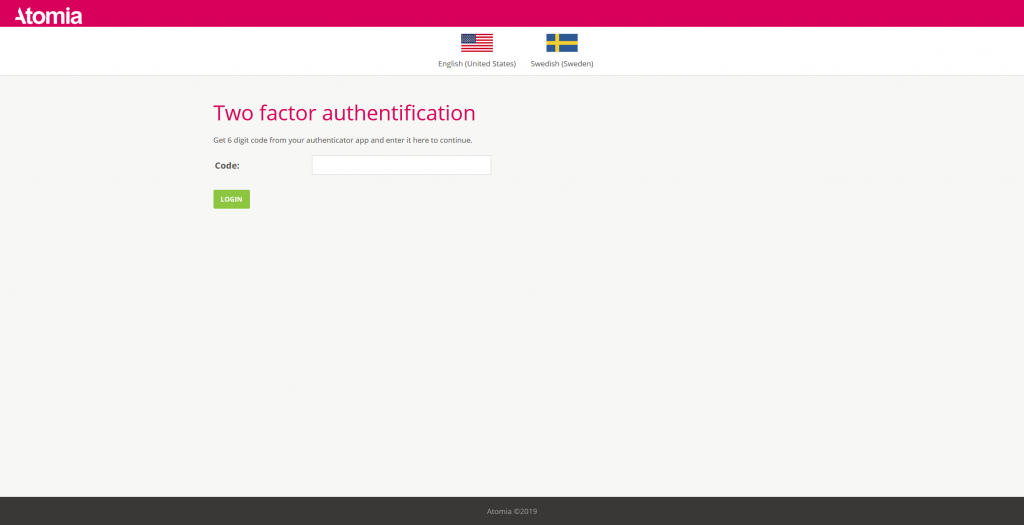
When the two-factor authentication is enabled, the user should not be able to login to the account without PIN (verification) code which is generated via the authenticator app. There are a few different authenticator applications that can be used. Some of them are:
- iPhone: Google Authenticator, Microsoft Authenticator, LastPass Authenticator
- Android: Google Authenticator, Microsoft Authenticator, LastPass Authenticator
Before you begin
Make sure the following section exists in the unattended.ini file:
[TwoFactorAuthentication]

EncCertThumb = value of the thumbprint
The purpose of this certificate is to secure code encryption and decryption.
Two-factor authentication in Atomia is implemented by a two-factor authentication plugin which should be enabled before usage. To enable it, follow the next steps:
- Go to Admin Panel > Settings > Plugin configuration.
- Go to the Other plugins tab.
- Click the Enable button for TwoFactorAuthenticationPlugin.
Enable two factor authentication per reseller
To allow 2FA for some reseller (including the main resseller), it’s must be enabled for that reseller. This can be done by following the next steps:
1. Go to Admin Panel > Settings > Plugin configuration.
2. Select reseller from the reseller dropdown list.
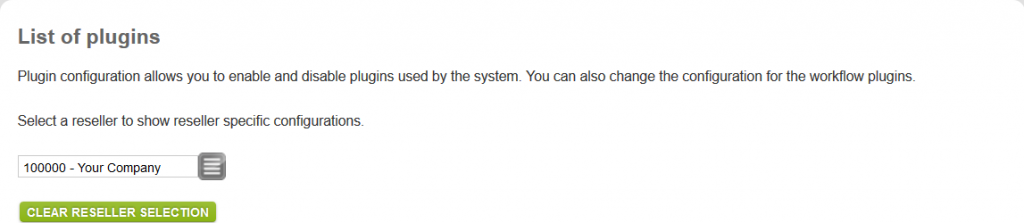
3. Click on Other plugins.
4. Click Configure for TwoFactorAuthenticationPlugin.
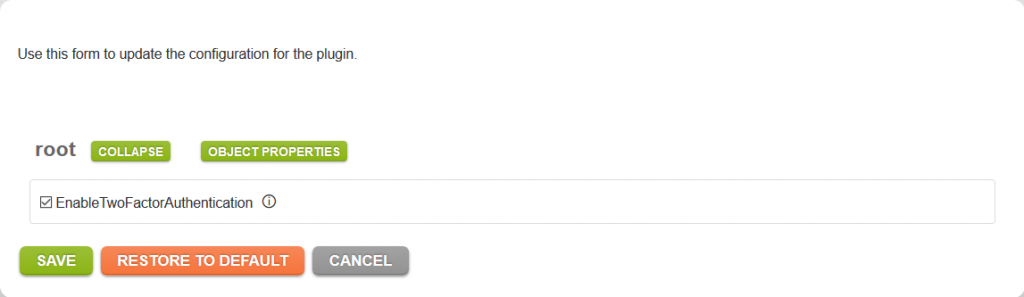
![]()
5. Check the check box EnableTwoFactorAuthentication.
6. Click Save.
Enable two-factor authentication per user
If the end-user wants to use 2FA feature, it should be enabled from the Billing Customer Panel. To enable it, follow the next steps:
1. Login to the Billing Customer Panel
2. Go to Users
3. Click on the 2FA button
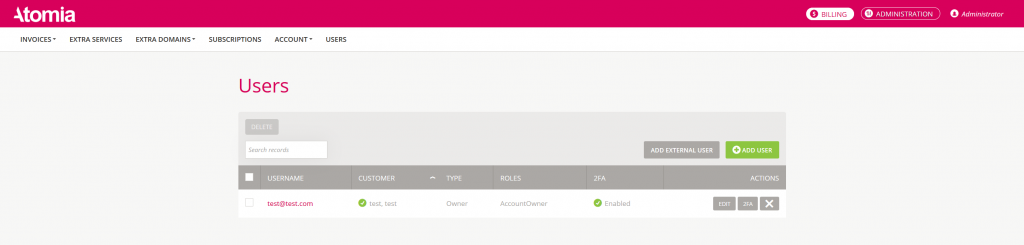
4. Click on the Enable button

5. The following page should be displayed
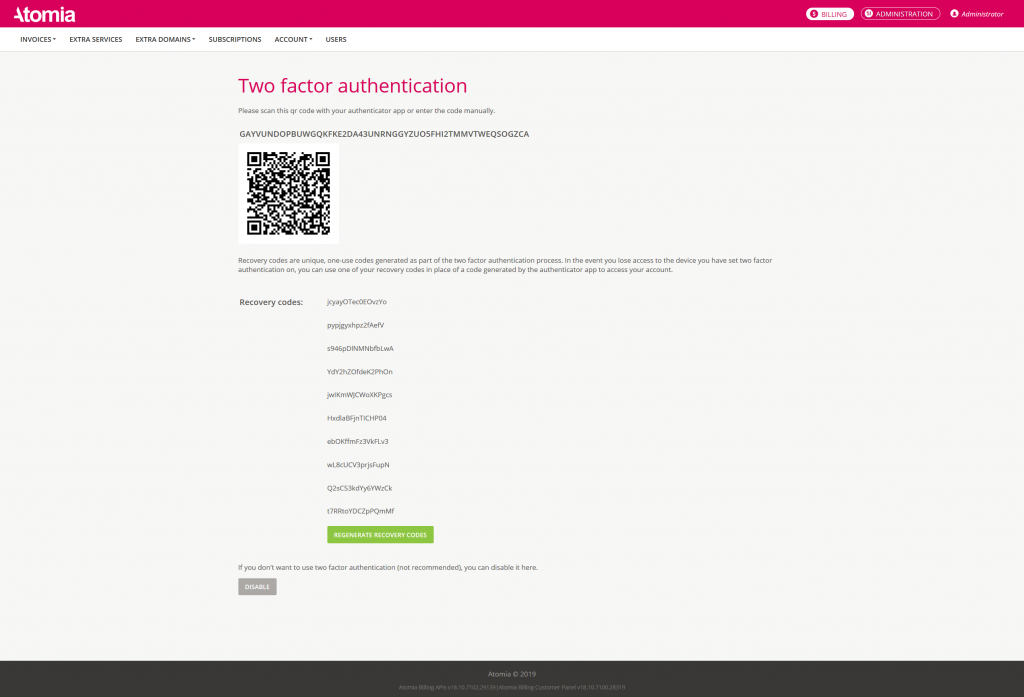
Start using two-factor authentication
On the Two-factor authentication page, do one of the following:
- Scan the QR code with your authenticator app. After scanning, the app displays a six-digit PIN code that you can use for access.
- If you can’t scan the QR code, you can copy and manually enter a code into the authenticator app. The effect is the same as QR code scanning.
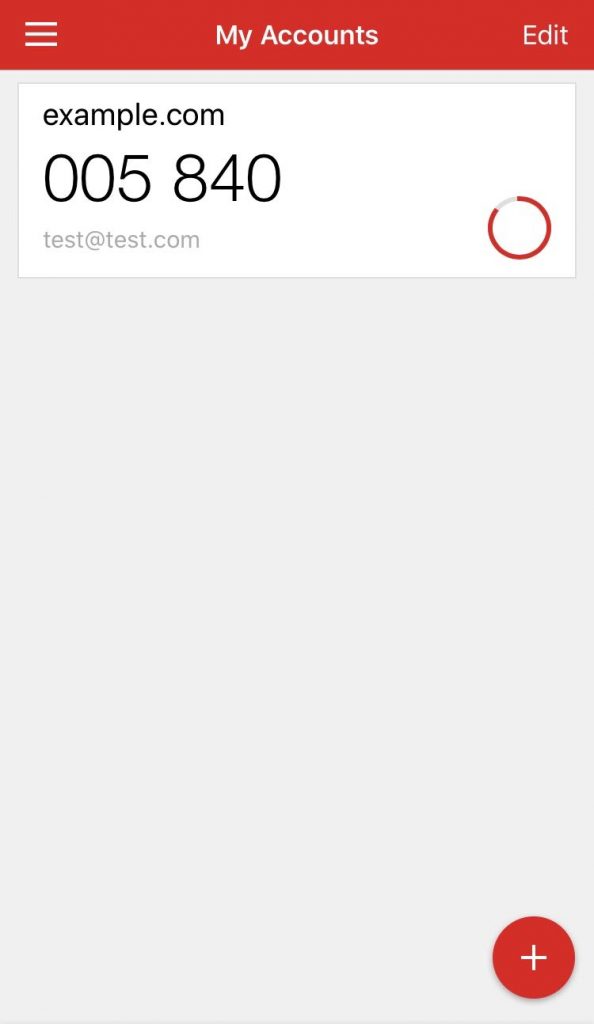
- After scanning, the authenticator app will generate a new PIN code that changes after a certain period of time. This is also known as TOTP or time-based one-time password.
Recovery codes
When you activate 2FA, you will get a list of 10 recovery codes that you should save in a safe place. If you lose access to your phone, you can use one of your recovery codes instead. Once you use a recovery code, it cannot be reused. If you have used all codes, you can generate another set of recovery codes. Regenerate a new set of recovery codes will invalidate any code previously generated. Also, if you disable two-factor authentication and activate it again, you have to scan the QR code again (or enter a code manually) because the old code will no longer create valid PIN codes. To use recovery codes follow the next steps:
1. Login to your Atomia account with your username and password
2. On the two factor authentication page, instead of using 6-digit PIN code, use one of your recovery codes