How to upload payment files, match pay file records with invoices and process them to create payments.
Uploading payment files
- Go to Admin Panel > Payments.
- Select Upload Payments.
- Browse for files to be uploaded and select Upload.
- When the files are uploaded, a report of the uploaded files are displayed. The report shows number of successfully uploaded files and lists any files with errors, as well as successfully parsed files.
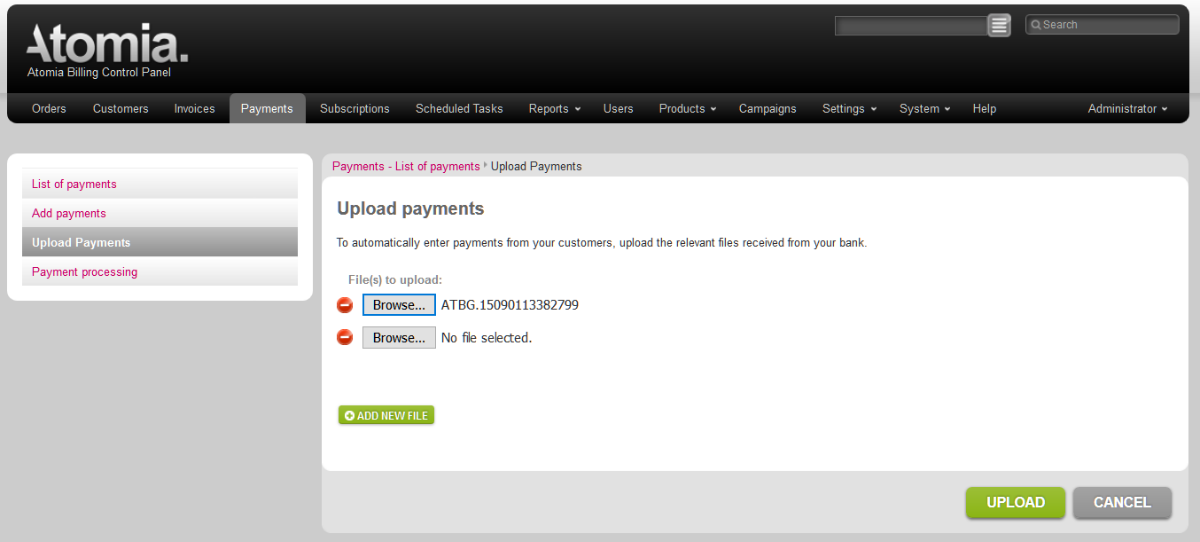
Image 1: Upload payments.
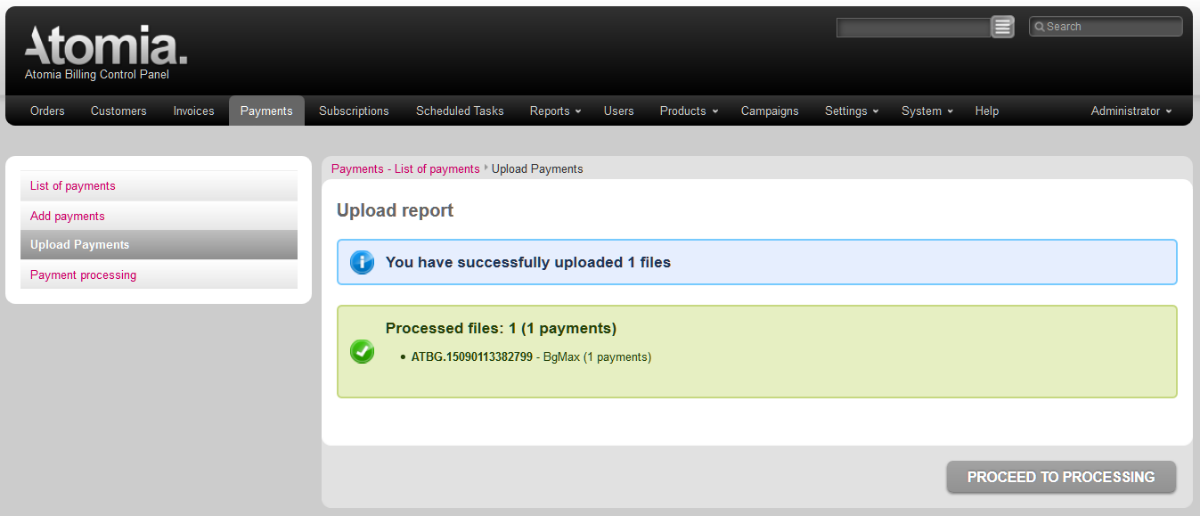
Image 2: Upload report.
Processing payments
- Go to Admin Panel > Payment processing.
- Browse pay file records to perform matching and processing.
- Process the desired payments. There are three ways of processing payments:
- Process payments one by one – Matched pay file records have a Process button displayed. Press this button to process the payment.
- Process several payments at once – Perform a bulk process by marking several records and selecting Process at the top of the table.
- Process all matched payments – Select Process matched payments at the bottom of the table to process all matched records. This option will also process the matched pay files not displayed on the current page.
- Select Unmatch to split up any match.
- When processing is started, the matched pay file records are converted into payments and invoices are marked as paid (if paid amount is equal or greater than invoice’s total).
- Pay file records with no matching invoice can’t be processed. To match payments, see Matching payments below.
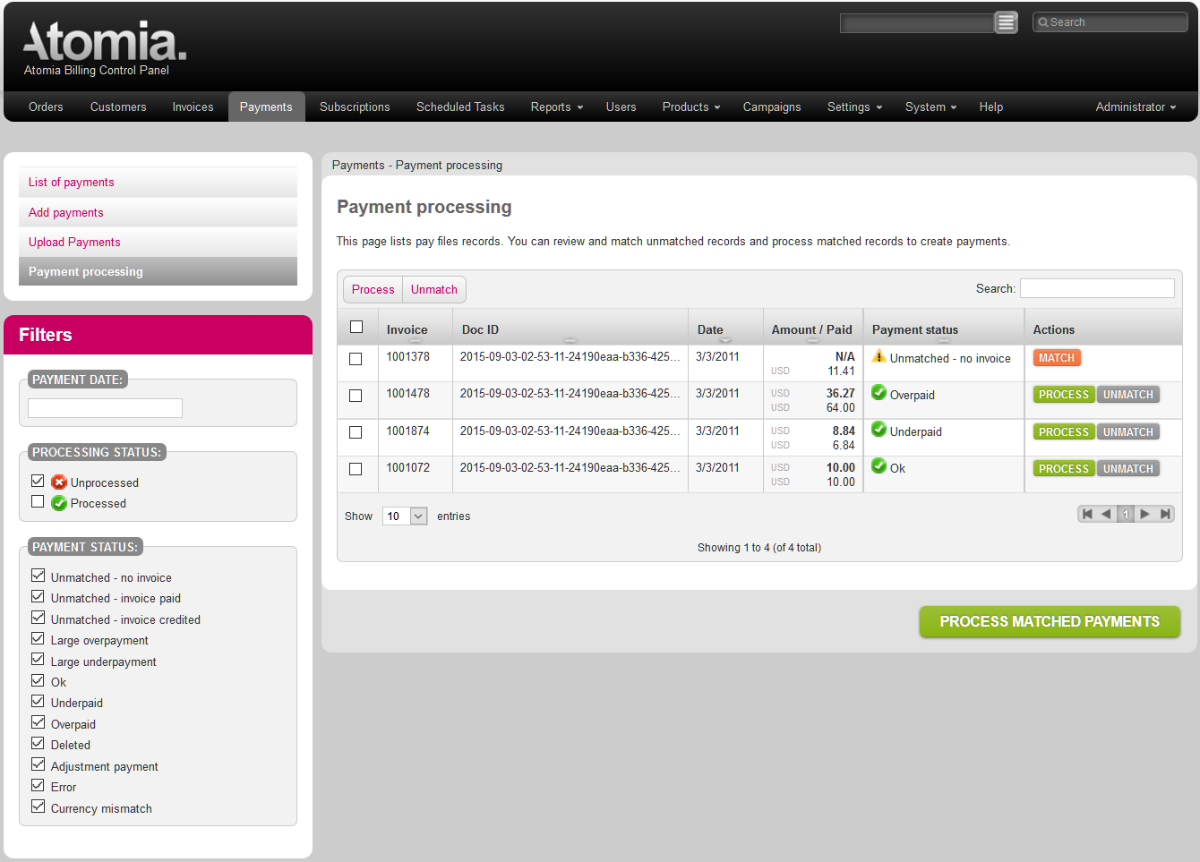
Image 3: Payment processing.
Matching payments
- Select Match in the Actions column for the pay file record.
- There are four sections on the Match payments page:
- Payment details – Displays basic payment data. To view Pay File Info and Additional Data, select More details.
- Pay File Info (hidden by default) – Displays details of pay file.
- Additional Data (hidden by default) – Displays pay file record data that can help you identify the invoice.
- Invoices – Matching candidates – List of invoices that could match the payment. The system uses info from the payment files, such as payer’s name and address, to detect matching invoices.
- Filter the suggested matches to locate the correct one. For example, in Image 4, the system located 42 invoices that contained similar data to the pay file. Using the Search box, list of invoices is narrowed to only two. Comparing the reference numbers from invoice and the payment file, it is evident that payment has been made with wrong reference number.
- If there are no matching invoices, a message will be displayed. Select Show all invoices and let me find matching one.
- Browse through all unpaid invoices to find the matching one.
- When you find the matching invoice, select Bind to bind pay file record to selected invoice.
- The pay file record now has Process action enabled in Payment processing. To process the payment, see Processing payments above.
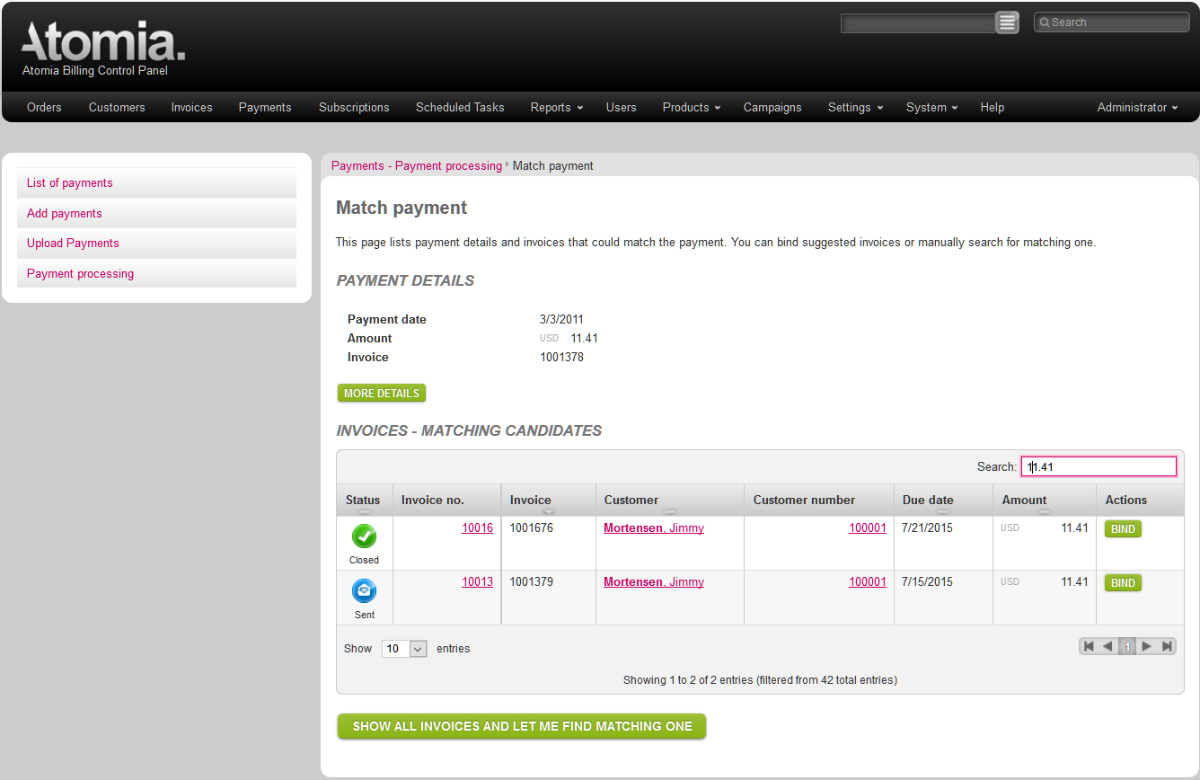
Image 4: Filtering matching candidates.
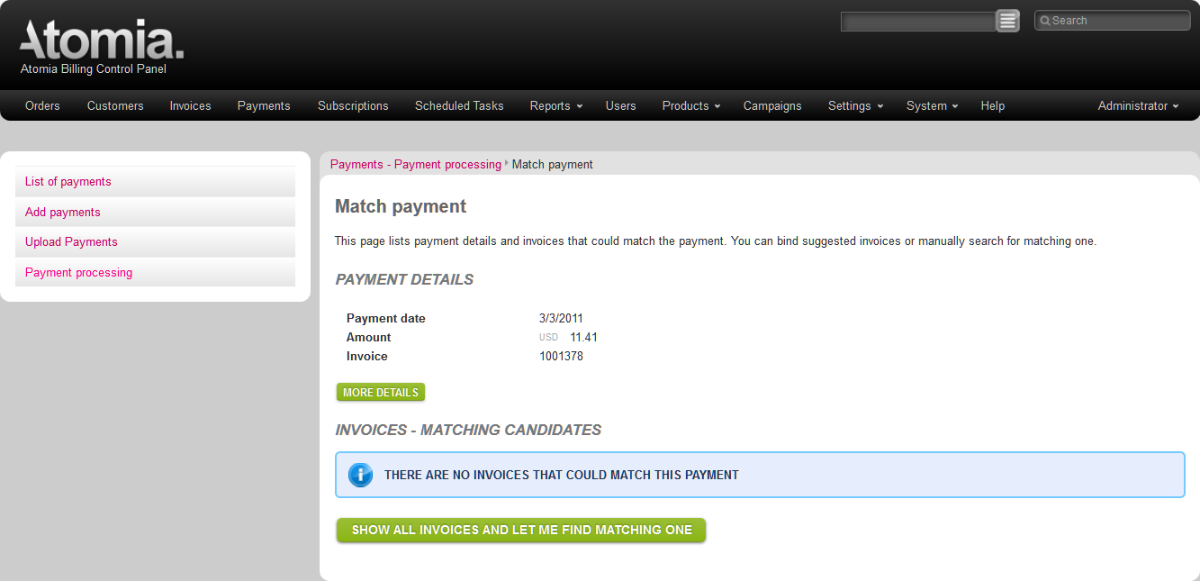
Image 5: Match payment.
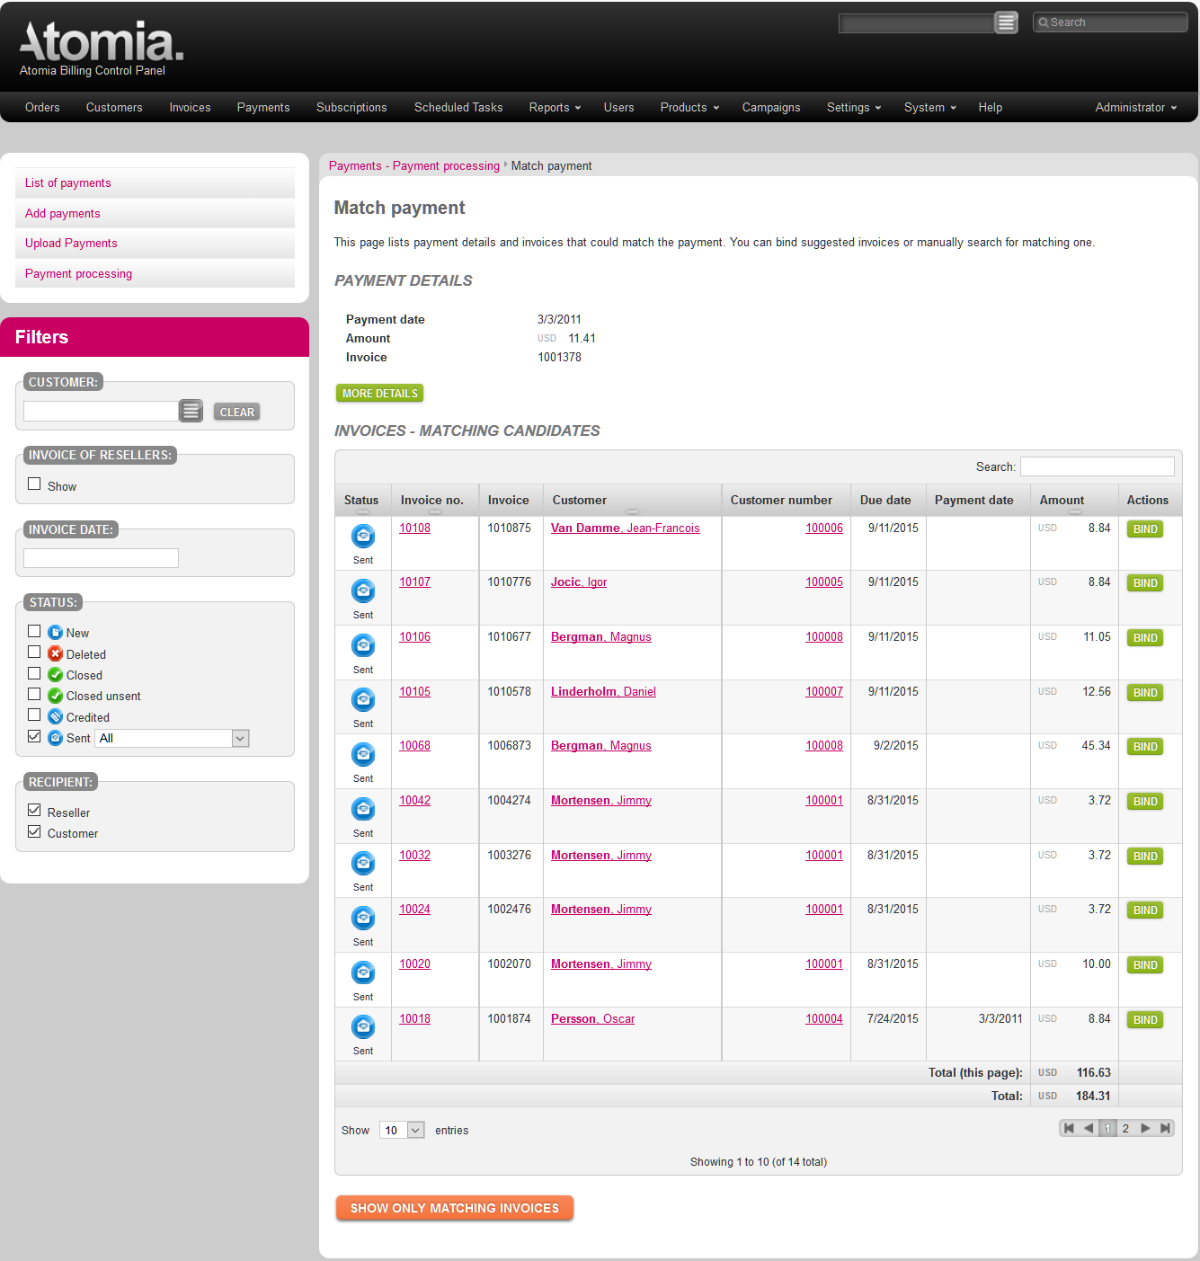
Image 6: Invoice browser.