How to force customers to confirm their personal data.
Overview
With this setup, a customer will be required to confirm his personal data after a specified amount of time (or only once) when he logs in to the User Panel (Hosting or Billing control panel).
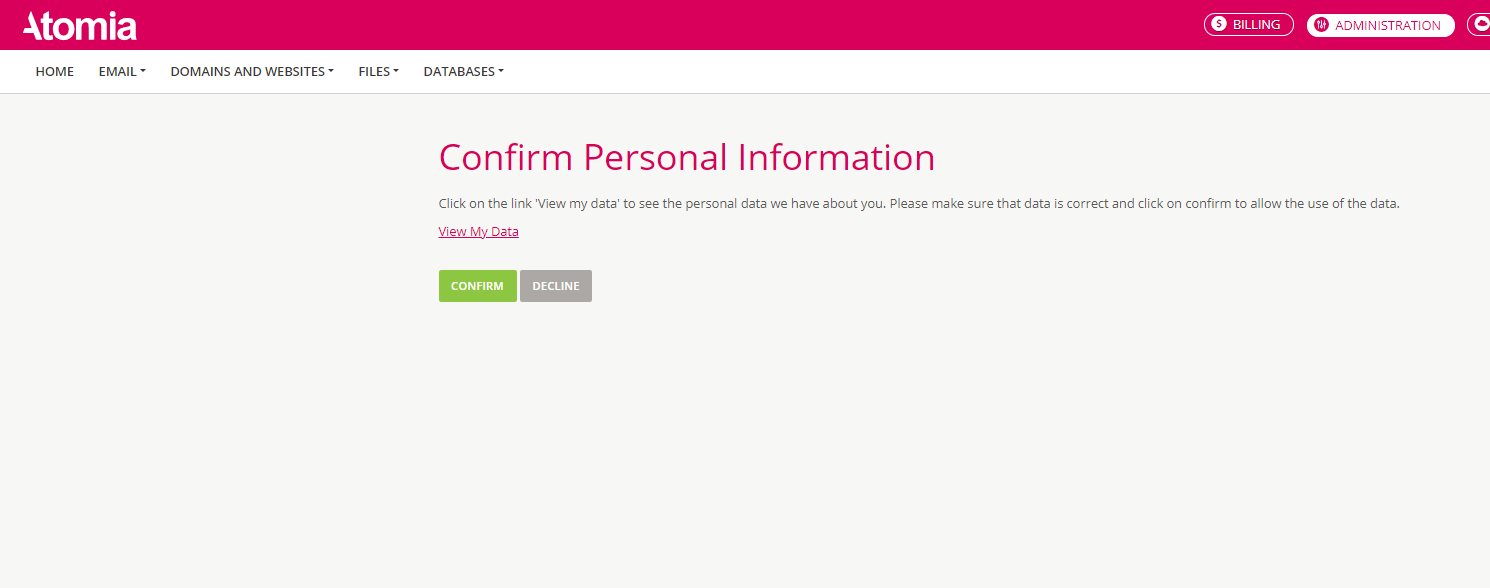
When the plugin is enabled and configured, a logged-in customer will be redirected to the personal information page and will not be able to open any other page until he confirms (which can be automatic on the page load) or declines to confirm his personal data. The page looks like this:
The customer can click on the “Confirm” or “Decline” (if visible) button. Click on “View my data” will reveal which personal data system has about the customer. The data can be edited by clicking on appropriate links.
If the customer clicks on “Confirm”, he will be redirected to the dashboard page.
If the customer clicks on the “Decline”, a pop-up will be displayed to confirm the choice.
- If the configuration option Terminate the account when the max number of rejections is reached is checked, then when the max number of rejections is reached, the customer account will be terminated.
- If this option is not checked, the customer will be only logged out and will be allowed to log in next time and will be redirected to the confirmation page again.
Enabling personal information plugin
- Go to the
Admin Panel > Settings > Plugin Configuration. - Click on Other Plugins tab.
- Click the Enable button for PersonalInformationPlugin.
- Add and enable UsePersonalInformationPlugin setting in
app.configfiles (globalSettingsList section) for billing customer panel and hosting control panel.
The usual paths are:C:\Program Files (x86)\Atomia\HostingControlPanel\App_Data\appConfig.config.C:\Program Files (x86)\Atomia\BillingCustomerPanel\App_Data\appConfig.config.
<globalSetting name="UsePersonalInformationPlugin" value="true" />
Setting up personal information confirmation per reseller
- Go to the
Admin Panel > Settings > Plugin Configuration. - Select a Reseller from the reseller dropdown list.

- Go to the Other Plugins tab.
- Find PersonalInformationPlugin and click on the configure button.
- Add or edit a configuration for the plugin.
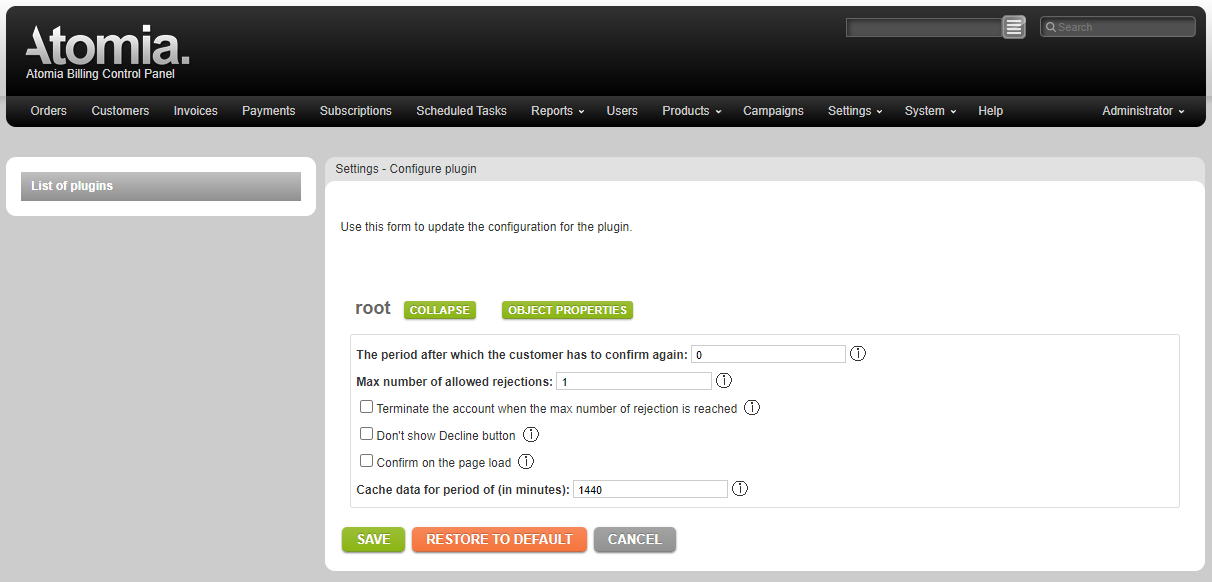
The plugin configuration has the following options:
- The period after which a customer has to confirm his personal data again: Number of days after which the customer needs to confirm his data again. If its value is 0, then the personal information page won’t be shown again after it has been confirmed.
- Max number of allowed rejections represents: this option represents how many times the customer is allowed to decline confirmation of using his personal information. Usable only if the terminate account option is checked as well.
- Terminate the account when the max number of rejections is reached: if this option is checked the account will be terminated when the max number of rejections is reached.
- Don’t show the decline button: If this option is checked, the decline button won’t be shown to the customer.
- Confirm on the page load: If this option is checked, then the personal information will be automatically confirmed on the page load without user interaction. The Decline button will not be displayed on the page regardless if Don’t show the decline button is checked or not.
- Cache data for a period of (in minutes): Cache plugin data for this period of time on the application level, the default value is one day. Set zero to skip caching (not recommended)


