How to create and manage messages.
Overview
Messages can be sent to all customers or to customers with selected products. Each message is defined by Subject, Body, Status and period of validity. Period of validity is set with Start date and End date. This time span defines the period during which the published message is visible in the Hosting Control Panel. Deleted and expired messages are hidden by default.
Creating and managing messages
- Go to Admin Panel > Settings > Customer messages.
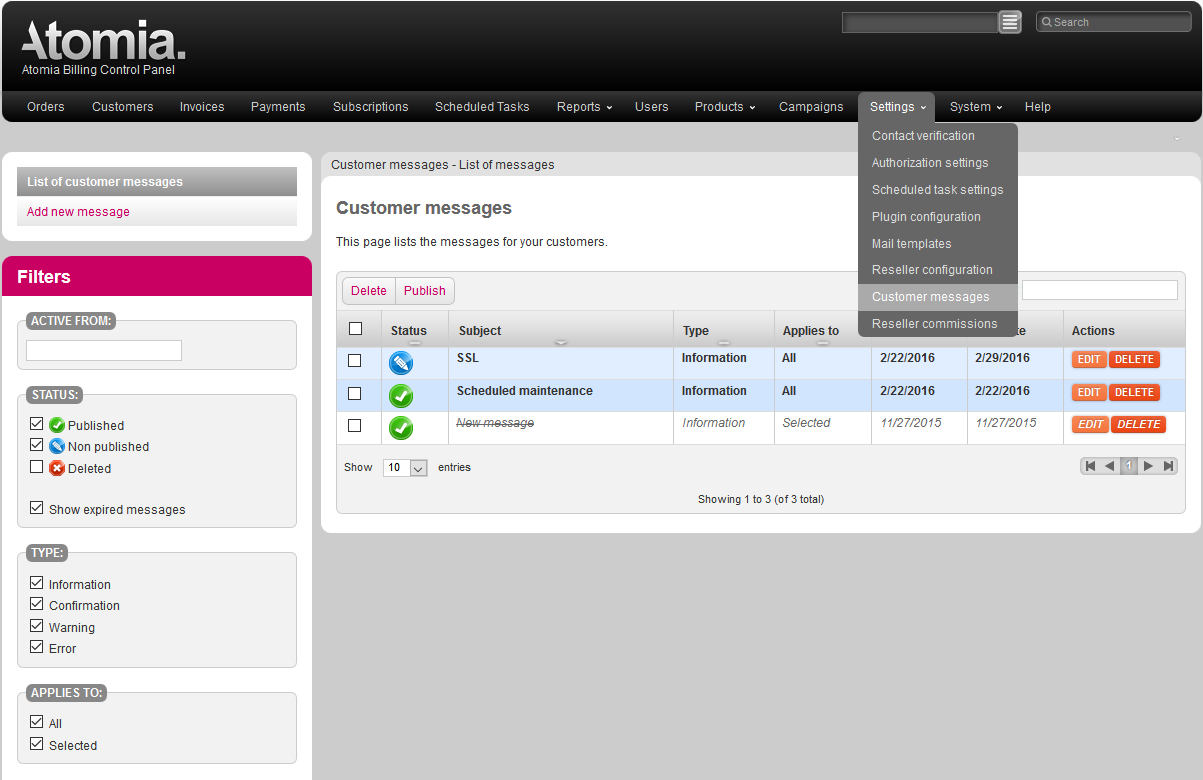
Image 1: Messages in the Admin Panel’s Settings menu.
- Select Add new message.
- Fill in desired Subject, Body, Start date, and End date.
- If you want to send the message to all customers, check the box All customers. If you want to send the message to customers with specific products, select Customers with the following products and select product from the list under Select products.
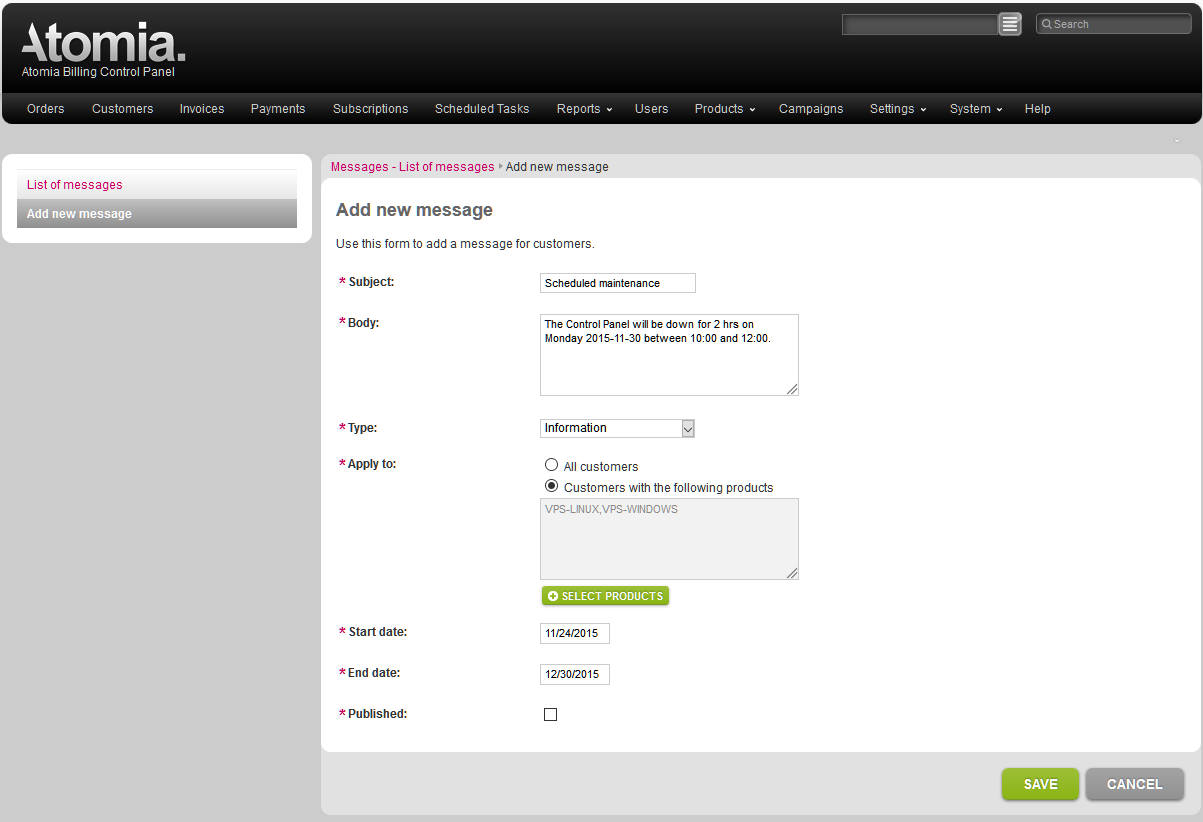
Image 2: Add new message dialog.
- Select Save.
Messages in Hosting Control Panel
Messages are listed in the Messages sidebox widget on the dashboard of the Hosting Control Panel.
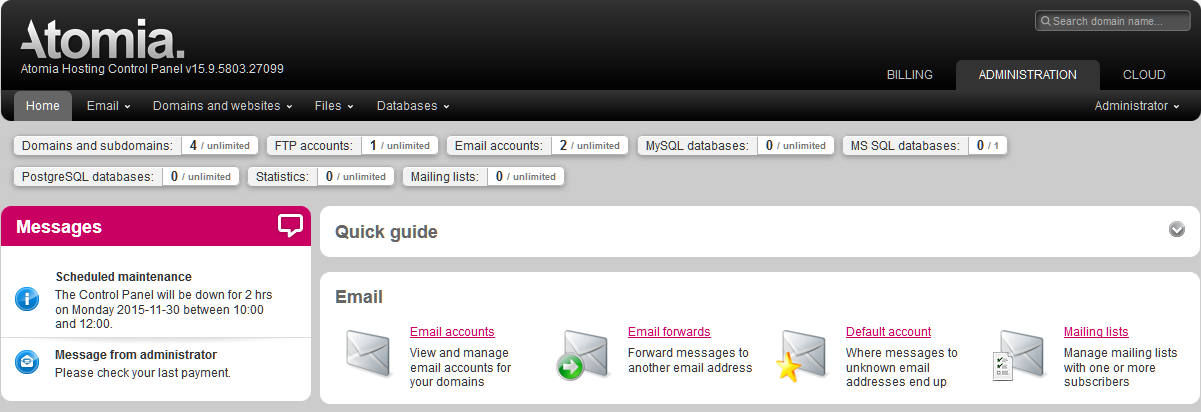
Image 3: Messenger sidebox widget in Hosting Control Panel.
The user can read and hide messages until they expire. IDs of closed messages are kept in the cookie.
Using Customer notes as message
- Select a customer and select Edit customer.
- Select Notes to edit an existing note or add a new one.
- Fill in Note, Note type and Visible until.
- Check the box Visible to customer. The note will be displayed as a Message from administrator in the Messages side panel, see Image 3. The message is displayed until the end of the day defined by Visible until.
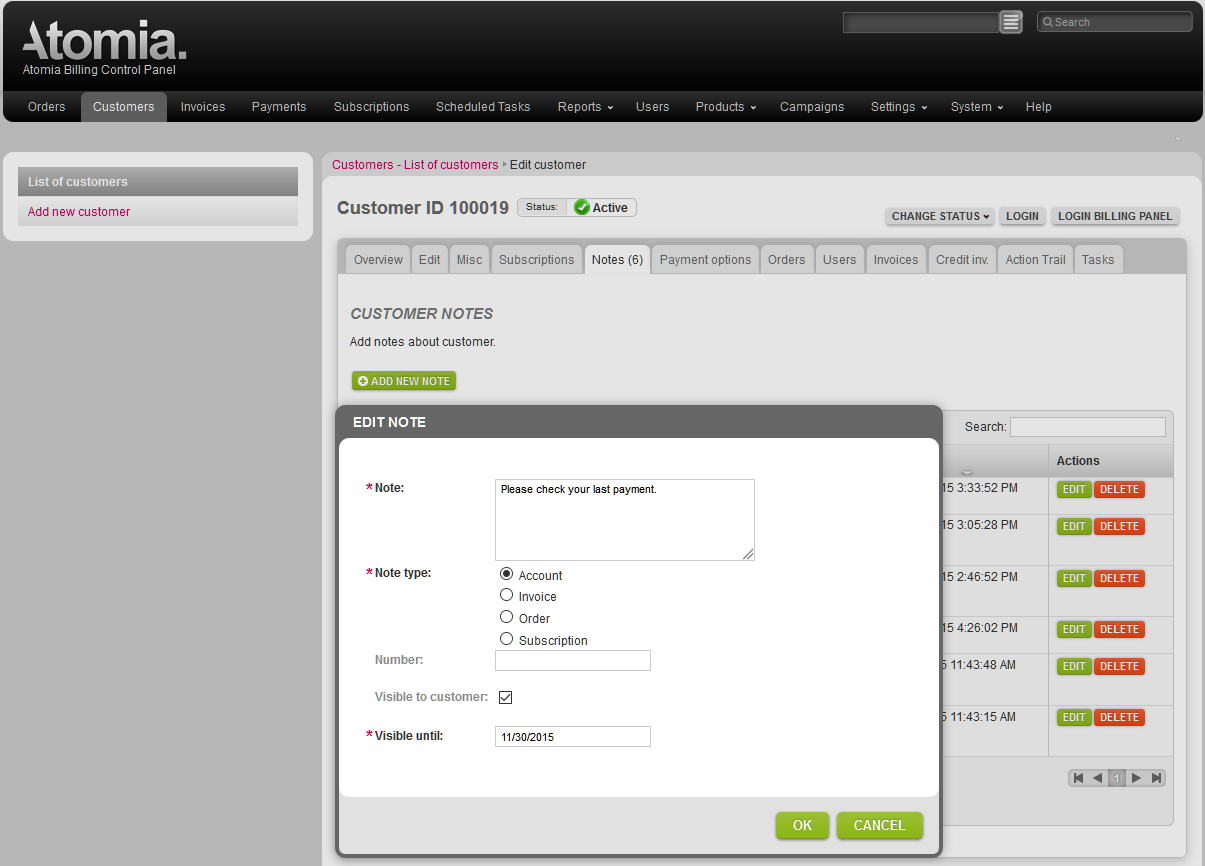
Image 4: Customer note visible to customer.
If you wish to disable the notes tab you can take a look at the guide here.