Overview
This integration overview should help you with the integration of Office 365. Installation instruction is made to be as much as possible out-of-the-box, however, there are many configuration options that can (and need to) be configured. Also, maybe the workflow is not clear to everyone as it should be. In this article, we will try to explain those peculiarities and make integration of Office 365 painless and stress-free.
Before you begin
Integration is designed for members of Microsoft’s Cloud Solution Provider (CSP) program and it’s not possible to be set up and used without a CSP license.
Installation and configuration
There are two places where installation/configuration is needed. The first one is Microsoft Partner Center portal, and the second one is Atomia system.
Microsoft Partner Center
You will need to create a Native App in the Microsoft Partner Center portal, then add the app to Admin agents group and, finally, if you want, you can change user password expiration policy to never expire. We strongly recommend updating password expiration policy, because if you skip this step, then the password will expire on every two months, and you’ll need to update configuration each time you change the password. If you have already set up Azure integration, you can skip this step.
Create a Web App
To create a Web App, you’ll need to:
- Go to the Microsoft Partner Center, log in with your CSP credentials and go to your Dashboard
- Go to Gear icon (left of the name in the upper right corner) > View all settings > App Management
- Click on Add new web app
- After creating secret will be displayed, store it somewhere safe.
Name of the apps is not important, however, rest of the data (App ID, Account ID, Commerce ID and Domain) is needed for configuring Atomia platform later on.
Add app to Admin agents group
After successful creation of the Native App, execute the following PowerShell script:
Connect-AzureAd

#Find the group that represents the Adminagents.

$group = Get-AzureADGroup -Filter "displayName eq 'Adminagents'"

#Find the service principal that has the same appId as your app.

$sp = Get-AzureADServicePrincipal -Filter "<strong>{AppId}</strong>'"

#Finally, add the service principal to the Adminagents group.

Add-AzureADGroupMember -ObjectId $group.ObjectId -RefObjectId $sp.ObjectId
{AppId} is AppId from the Native app that you have created earlier.
This script will add the native app to the admin agents group. By being in this group, native app will have necessary permissions to create/suspend subscriptions, add users to customers, add domains, etc.
Set user password expiration policy to never expire (optional)
To change user’s password expiration policy to never expire, you’ll need to:
- Have username/password for CSP user (or his admin)
- Install Microsoft Online Services Sign-in Assistant for IT Professionals RTW.
- Install Windows Azure Active Directory Module for Windows PowerShell
- Follow this guide (ignore “Install the required PowerShell modules” point 1. and 2. from the guide, and start at point 3 of that section)
Atomia system
Automation Server
Setting up Automation server consists of adding a resource to the Resources.xml file and setting up which provisioning packages should have Office 365 support.
Adding a resource
All resources are in the Resources.xml file. There is already a binding for module Atomia.Provisioning.Modules.MsCSP.MsCSP, with commented out example resource configs. If you have already set up Azure integration, majority of the properties will already be configured, so you can just add the missing ones.
Example config:
<bindings>
<moduleList>
<module name="Atomia.Provisioning.Modules.MsCSP.MsCSP" resourceAsignmentPolicy="RoundRobin" />
</moduleList>
<resourceList>
<resource name="MsCSPOffice365Resource">
<property name="AppId">72c4f50c-fcf6-4bfd-908f-f022685d8880</property>
<property name="ClientSecret">b6bHxlQMrxg2OHcgCayPhFo761F5PTmdZtXM8ri9dh0=</property>
<property name="RefreshToken"></property>
<property name="MicrosoftLoginUrl">https://login.microsoftonline.com/common/oauth2/authorize</property>
<property name="PartnerCenterEndpoint">https://api.partnercenter.microsoft.com</property>
<property name="AuthentificationEndpoint">https://login.microsoftonline.com/</property>
<property name="GraphEndpoint">https://graph.windows.net</property>
<property name="ResourceManagerEndpoint">https://management.azure.com/</property>
<property name="ManagementEndpoint">https://management.core.windows.net/</property>
<property name="CommonDomain">common</property>
<property name="MaxNumberOfAllowedO365Licences">-1</property>
<dbOverrideList name="Office365OverrideList">
<propertyListItem>RefreshToken</propertyListItem>
</dbOverrideList>
</resource>
</resourceList>
</bindings>
Properties explanation:
- AppId – Web application ID from partner center
- ClientSecret – Web application secret from partner center
- RefreshToken – Token used for user authentication. This property is dynamically generated.
- MicrosoftLoginUrl – Authentication endpoint which is used to obtain partner consent.
- CommonDomain – The authority url path used to obtain access token. This must be set to common.
- MaxNumberOfAllowedO365Licences – Maximum number of licences one customer can have, -1 stands for unlimited (limit is defined by the offer from Microsoft)
Rest of the properties (that end with “Endpoint”, e.g. “PartnerCenterEndpoint”) are URLs to different API endpoints and can stay like in the example.
If multiple resellers in Atomia have their own CSP accounts, then there should be a resource for each CSP and resourceAsignmentPolicy should be “ResellerSpecific”.
Here is an example for two resellers with a CSPs:
<bindings>
<moduleList>
<module name="Atomia.Provisioning.Modules.MsCSP.MsCSP" resourceAsignmentPolicy="ResellerSpecificArbitraryPolicy" />
<module name="Atomia.Provisioning.Modules.MsCSP.MsCSP" resourceAsignmentPolicy="RoundRobin" />
</moduleList>
<resourceList>
<resource name="MsCSPOffice365Resource1">
<property name="ResellerSpecific.PolicyAgent">RoundRobin</property>
<property name="AppId">72c4f50c-fcf6-4bfd-908f-f022685d8880</property>
<property name="ClientSecret">b6bHxlQMrxg2OHcgCayPhFo761F5PTmdZtXM8ri9dh0=</property>
<property name="RefreshToken">refreshtoken123</property>
<property name="MicrosoftLoginUrl">https://login.microsoftonline.com/common/oauth2/authorize</property>
<property name="PartnerCenterEndpoint">https://api.partnercenter.microsoft.com</property>
<property name="AuthentificationEndpoint">https://login.microsoftonline.com/</property>
<property name="GraphEndpoint">https://graph.windows.net</property>
<property name="ResourceManagerEndpoint">https://management.azure.com/</property>
<property name="ManagementEndpoint">https://management.core.windows.net/</property>
<property name="CommonDomain">common</property>
<property name="MaxNumberOfAllowedO365Licences">-1</property>
<property name="ResellerSpecific.AllowSubresellers">all</property>
<propertyList name="ResellerSpecific.AllowedResellerIds">
<propertyListItem>100000</propertyListItem>
</propertyList>
<dbOverrideList name="Office365OverrideList">
<propertyListItem>RefreshToken</propertyListItem>
</dbOverrideList>
</resource>
<resource name="MsCSPOffice365Resource2">
<property name="ResellerSpecific.PolicyAgent">RoundRobin</property>
<property name="AppId">56c4f50c-fcf6-4bfd-908f-f022685d5551</property>
<property name="ClientSecret">b6bHxlQMrxg2OHcgCayPhFo761F5PTmdZtXM8ri9dh0=</property>
<property name="RefreshToken">refreshtoken123</property>
<property name="MicrosoftLoginUrl">https://login.microsoftonline.com/common/oauth2/authorize</property>
<property name="PartnerCenterEndpoint">https://api.partnercenter.microsoft.com</property>
<property name="AuthentificationEndpoint">https://login.microsoftonline.com/</property>
<property name="GraphEndpoint">https://graph.windows.net</property>
<property name="ResourceManagerEndpoint">https://management.azure.com/</property>
<property name="ManagementEndpoint">https://management.core.windows.net/</property>
<property name="CommonDomain">common</property>
<property name="MaxNumberOfAllowedO365Licences">-1</property>
<property name="ResellerSpecific.AllowSubresellers">all</property>
<propertyList name="ResellerSpecific.AllowedResellerIds">
<propertyListItem>100001</propertyListItem>
</propertyList>
<dbOverrideList name="Office365OverrideList">
<propertyListItem>RefreshToken</propertyListItem>
</dbOverrideList>
</resource>
</resourceList>
</bindings>
Setting up packages
For every package that should support Office 365 in <packageDescription> in the ProvisioningDescription.xml file, is needed to do the following steps:
- Add:
<service name="CsMsCSP" />
under <serviceList> section.
- Add:
<group maxCount="1">
<service name="CsMsCSP" />
</group>
under <serviceLimitationList> / <globalLimitation> section
- If you want to use only Office 365 integration without the Azure integration, add the following limitation to the section from 2:
<group maxCount="0">
<service name="MsCSPAzureSubscription" />
</group>
Billing API
There is an optional configuration in the Web.config of the Billing API under custom product properties section for MsOffice365.
- ParentService – Should be name of the parent service for the MsCSPOffice365Subscription (default is CsMsCSP)
- SendMailToBilling – If true, it will send welcome mail (mail with credentials for login) for newly created Microsoft Customer to Atomia’s customer Billing Address, instead of the main one
Scheduled tasks
For Office 365 integration to run correctly, only scheduled task responsible for automatic verification and setup of the domains is needed.
Turning the task on and specifying how often to run is done in Atomia Admin panel > Settings > Scheduled task settings page.
Task behavior is closely described in “System overview” section.
Verify and Setup scheduled task configuration
Full name of this task is Office365VerifyAndSetupScheduledEventHandler. Its configuration can be set up in Admin panel > Settings > Plugin configuration page.
To edit the configuration, press the button CONFIGURE next to Office365VerifyAndSetupScheduledEventHandler.
The button opens the configuration page. The configuration has the following fields:
- Scheduled items count – Number of domains to be verified and setup during one run of the scheduled task (default is 50)
- Office365 provisioning service – Name should match service name used for the provisioning of the Office 365 subscription (default is MsOffice365)
Control panels
Setting up the behavior of the Office 365 integration in both of the Hosting Control Panel and Customer Panel is possible through configuring app config files.
Hosting Control Panel
Configuration can be found in the Atomia.Web.Plugin.Office365.dll.config file in HostingControlPanel.
Under the pluginSettingsList section, there is a configuration for MsOffice365.
- MsOffice365ServiceName – Should be the name of the provisioning service for the Office 365 subscriptions (default is MsOffice365)
Customer Panel
Configuration for the Customer Panel can be found in the Atomia.Web.Plugin.BillingCustomerPanel.ExtraServices.dll.config file in BillingCustomerPanel.
Under the pluginSettingsList section, there is a configuration for MsOffice365.
- MsOffice365ServiceName – Should be the name of the provisioning service for the Office 365 subscriptions (default MsOffice365)
- Office365NameOfShop – Needs to match the name of the shop where you will add Office 365 products that are eligible for purchase (default is O365Shop)
- MsOffice365AllignSubscriptions – If true it will align next renewal date on all of the customer’s Office 365 subscriptions when a new subscription is bought, making all of the subscriptions with the same next renewal date, thus, all the billing cost will end up on the same invoice. Price for all of the aligned subscriptions is going to be prorated only if prorating is enabled in product’s configuration (allow prorate).
- MsOffice365PreventDecrease – If true it will remove options in the drop-downs (Subscriptions page) for lowering the number of licences to a number smaller than the number of currently active (consumed) licences. Microsoft is allowing this action, but some random user will end up with an invalid licence. The recommended value is true.
Set up products
Office 365 product
When adding a new Office 365 product, the best practice should be to follow the configuration that is present on MS-OFFICE365-DEFAULT item. That item comes with the vanilla installation of Atomia, and the only thing that needs configuring is Offer Id custom attribute.
Go to Admin panel > Products > Products > Add new product
Configure product the way you want (recommended configuration is the one that is present on MS-OFFICE365-DEFAULT item).
If in your Atomia environment REACTIVATE-FREE item is for some reason missing, then MS-OFFICE365-DEFAULT item will not be automatically created, thus you will not be able to see what is the default configuration for the MS-OFFICE365-DEFAULT item. In that case, you should set up configuration of the new Office 365 product by setting the following properties:
- Provisioning service: MsOffice365.
- Product category: Extra service.
- Provisioning allowed: Allowed after payment
- Type of Billing: Fixed price (Recurring)
- Termination Configuration: Set termination delay period to 120, with all of the options turned on. For the reactivation product, because you do not have REACTIVATE-FREE, you’ll need to provide one.
- Fill article number, name and description as desired
- Fill the rest of the options to suit your needs
There are some mandatory (must be present) and optional custom attributes that are used for additional configuring.
Mandatory custom attributes:
- OfferId – Can be found at the Microsoft Partner Center, in Pricing and Offers section. Determines the exact offer (type of the Office 365 subscription) reseller wants to offer for purchase.
- minimalproductvalue – Minimum option value that can be seen in Office 365 management (Subscriptions page), when buying and changing the quantity
- maximalproductvalue – Maximum option value that can be seen in Office 365 management (Subscriptions page), when buying and changing the quantity
- SubscriptionSubscriptionQuantityServiceQuantityProperty – Name of the quantity attribute on Office365 service in automation server (usually it should be Quantity)
- tos – Because Microsoft introduced a customer acceptance confirmation before any order or quantity change, you have to add this attribute. The value is resource key in tos default resource file (NewDefaultCommon) which should have a link to Microsoft cloud agreement template.
Optional custom attributes:
- SubscriptionIsSeatBased – If true it will enable changing quantity through Customer Panel/MySubscriptions page (not recommended)
- BillingCycleType – Can be Annual, Monthly and None. This will affect how Microsoft bills CSP. If this custom attribute is not present, the default period will be Monthly.
- SubscriptionName – Name that will become the name of the subscription on Microsoft. If not present, it will use the description of the subscription.
Package product
You’ll need to also add one custom attribute to the product for the main package which has Office 365 included (Automation Server > Setting up packages part of this overview). Custom attribute to add:
- hasoffice365 with value true
Set up shop
You’ll need to create a shop that is going to be used as a store for showcasing Office 365 products available for purchase.
Go to Admin panel > Products > Shops > Add new shop
Name of the shop is important, and whatever name you choose, be sure to update attribute Office365NameOfShop in Atomia.Web.Plugin.BillingCustomerPanel.ExtraServices.dll.config file in BillingCustomerPanel. Default, and recommended, name is O365Shop.
Add all of the Office 365 items (products) you want to be visible on Office 365 management page (Subscriptions page). For category choose ExtraService. When finished, click on SAVE to finalize adding of the new shop.
You’ll also need to add those items to the DefaultShop, but this time with Office365 category (create category if doesn’t exist in Admin panel > Products > Shops > Categories)
System overview
This section gives a more detailed info on how the integration works, once it’s set up.
Scheduled tasks
Verify and Setup scheduled task
This task is used for automatic verification and setup of the domains that have been added to Office 365 through Atomia platform on Hosting Control Panel Dashboard > Office 365 > Domains page.
When a domain is successfully added to the Microsoft Office 365, before it can become fully active, it will be required to verify the ownership of the said domain. This is accomplished by adding a TXT verification record (provided by Microsoft) to domain’s authoritative DNS Zone. After verification, in order for Microsoft services to work (Skype, Mail etc.) you would need to add service records.
Usually Office 365 user would add this records manually (by going to the DNS server directly), however, since Atomia has its own DNS server, this steps can be done automatically.
This scheduled task will periodically check if there are some unverified domains for the customers that have active Office 365 subscription, and if so, it will try to:
- Verify domain
- If verification is OK, add service records
Pages
Subscriptions
Link to this page can be found on Hosting Control Panel Dashboard > Office 365 section.
Subscriptions page is, in fact, the complete all-in-one-solution for your Office 365 subscriptions management needs. On this page you can:
- Order new Office 365 subscriptions
- Change quantity (number of licences) of the already bought Office 365 subscriptions
- Terminate Office 365 subscriptions
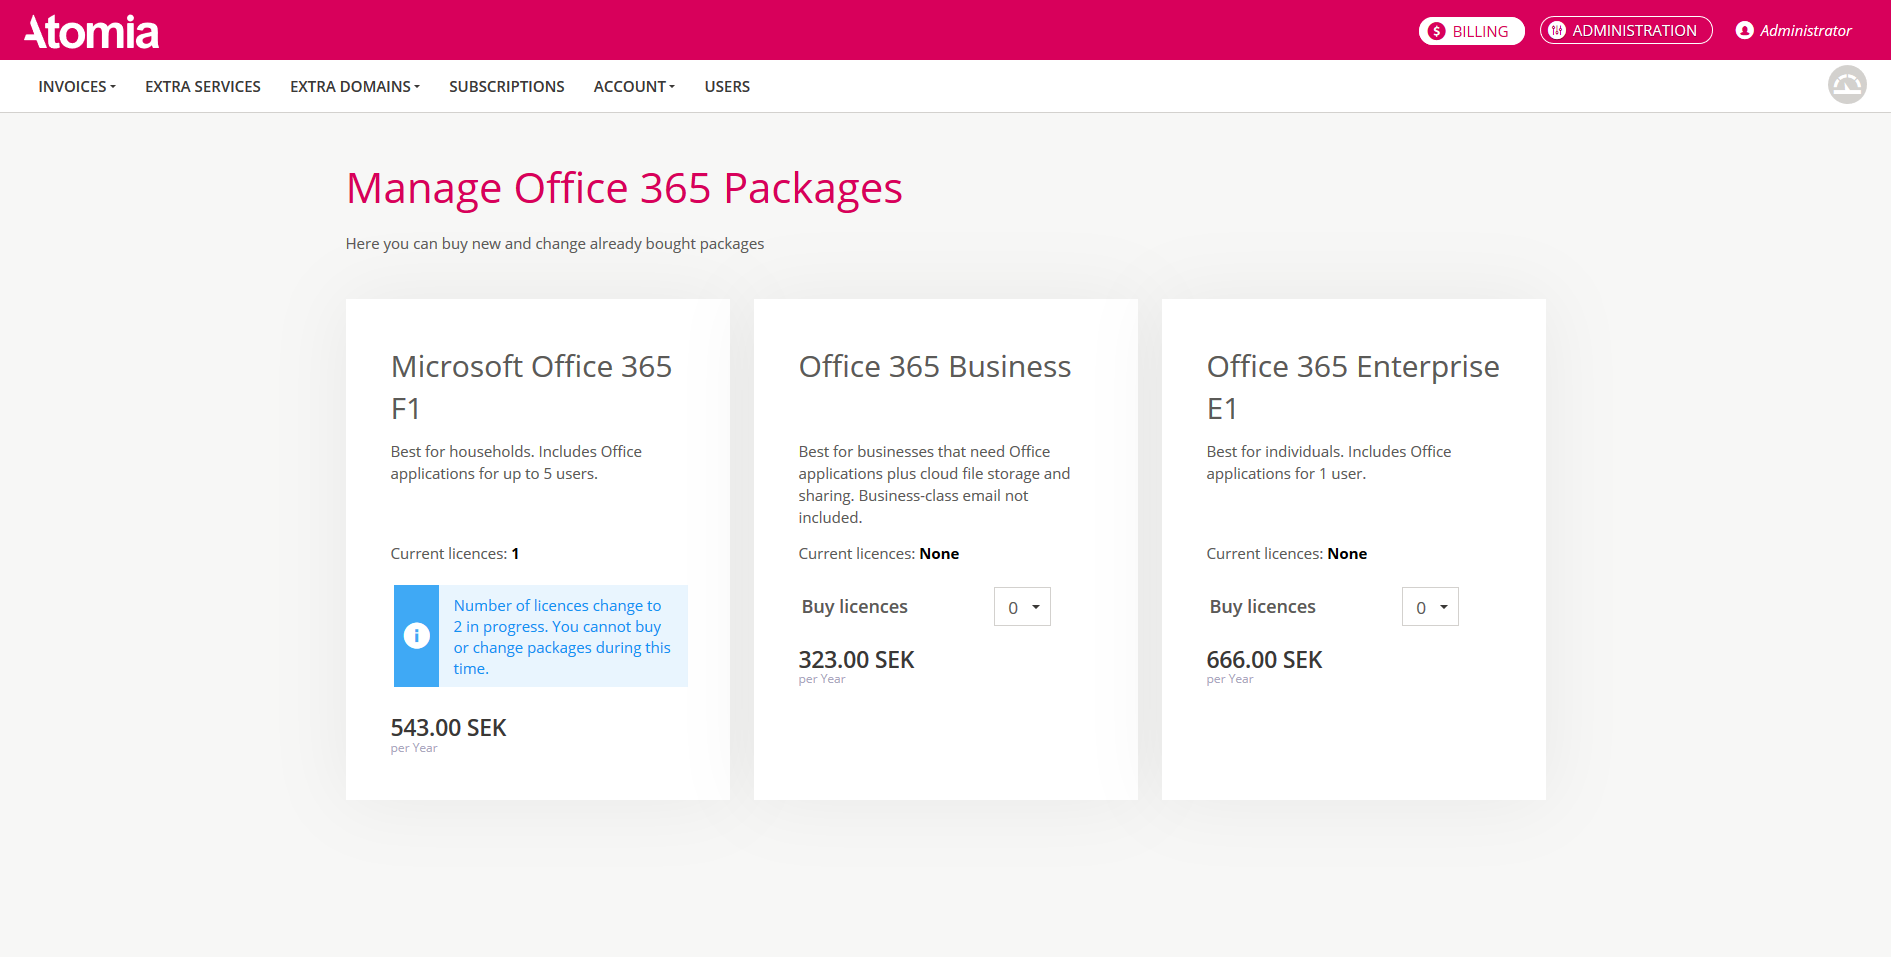
Products that can be seen on this page are products that have been previously added to the O365 Shop (O365Shop is the default name of the shop). You can have only one Office 365 subscription of the same type active at the time.
Type of the Office 365 subscription is determined by the Offer Id attribute of the product. All subscriptions have the same renewal period that is chosen when buying Office 365 subscription for the first time. After that purchase, all other Office 365 subscriptions will have the same renewal period as the first one.
When changing quantity (number of licences) to a larger number of the currently owned, cart will be shown at the bottom of the page, and an invoice will be created after you have confirmed the purchase. If reseller has enabled prorate option in the product, then, all prices when changing quantity will be prorated (e.g. if subscription with 1 licence is bought on the first of the January for a 100 €, with renewal period of one year, when changing quantity to 2 in June, price should be 50% off, since it has passed approximately 1/2 of the renewal period).
When changing quantity (number of licences) to a smaller number of the currently owned, cart will be shown at the bottom of the page, but no invoice will be created (its free to decrease the number of the licences). However, if decrease is done to a number lower than currently consumed licences (e.g. you have 5 licences, however, users are already using 3 of licences, and you decrease the number of the licences to 1), then some random users’ licences will become invalid (Microsoft is allowing this type of the behavior). If you want to prevent this, you can change in configuration to remove options that will lead to invalid licences.
When changing quantity (number of licences) to 0 (zero), you will be cost-free terminating your Office 365 subscription (subscription on Microsoft will be suspended and all licences invalid).
During the provisioning of the quantity change (first-time purchase, changing the quantity or terminating), you will not be able to make additional changes to that subscription. After provisioning is done, you will be able to make changes again.
Domains
Link to this page can be found on Hosting Control Panel Dashboard > Office 365 section.
The idea behind this page is to have a page where the customer can add or remove domains to his Office 365. Forcing verification/setup of the domains is also possible.
Before being able to add or remove domains, you’ll need to first buy at least one of the Office 365 subscriptions.

Generally speaking, in order for some domain to be successfully verified and setup on Office 365, the following steps must be done (in this order):
- Add domain to the Office 365
- Get a TXT verification record from the Office 365 for the previously added domain
- Add the TXT verification record to the domain’s DNS authoritative zone
- Verify domain on the Office 365 (verification is successful if correct TXT verification record has been added and is visible when doing DNS lookup)
- Get service records from the Office 365 for the previously verified domain
- Add service records to the domain’s DNS authoritative zone
If a customer adds the domain to the Office 365 without the use of Atomia’s Office 365 integration, then, this steps must be manually done, one by one.
TXT verification record is needed for the verification of the ownership of the domain. The logic behind it is if you add unique text string as TXT record on the domain, Microsoft could do a DNS lookup for that unique TXT record. If TXT record has been found, this is a sign for Microsoft that you have authority to change DNS records of the domain, and thus, you must be the owner of the domain.
After the domain is successfully verified, services (e.g. Skype, Mail etc.) will still be unavailable. In order to make this services to work as expected, you’ll need to add service records.
If the domain is added on the Domains page of the Office 365 section in Atomia, then all of the steps above will be, if authoritative DNS zone is hosted by Atomia’s DNS server, automatically done.
After adding a domain on Domains page, the following will happen “under the hood”:
- The domain will automatically be added to the Office 365
- It will automatically get and add TXT verification record (if authoritative DNS zone is hosted on Atomia’s DNS server)
- Try to verify domain
- If verification is OK, then get and set service records (if authoritative DNS zone is hosted on Atomia’s DNS server)
If domain could not be verified, then, after some time, the scheduled task will try again to verify it and do setup later.
You can force verification (if you do not want to wait for the scheduled task) by clicking on VERIFY NOW button. After successful verification, you can add service records by clicking on the SHOW/SETUP DNS RECORDS button. By clicking on this button service records will be added, and this domain should be fully set up.
If authoritative DNS zone is not hosted on Atomia’s DNS server, then TXT and service records need to be added manually. But how to know which TXT and service records to add?
Every time when you force verification, if verification is not successful, you will see information what TXT record you need to add manually. However, when forcing setup, you will always see information about service records (regardless if authoritative DNS zone is hosted on Atomia’s DNS server or not), since there is no way that we can check if service records are working. So, to be sure, even after successful setup, you can view service records needed for setup by clicking on SHOW/SETUP DNS RECORDS.
To sum everything up, here are possible ways of verification and setup of domains:
- Domain’s authoritative DNS zone is not hosted on Atomia’s server
- You’ll need to manually add records for verification. You can found out what records you need to add by clicking on VERIFY NOW button
- After you have added them, you’ll need to click VERIFY NOW, or wait for the scheduled task to process it.
- After verification, add setup (service) records (you can find out what service records you need to add manually by clicking on the SHOW/SETUP DNS RECORDS button)
- Domain’s authoritative DNS zone is hosted on Atomia’s server
- It will automatically all in one go try to
- add domain to the Office 365
- verify it
- add setup records
- If not successful at first, the scheduled task will try to verify and set up this domain after some time
- If you don’t want to wait for the scheduled task, you can force verification/setup
- It will automatically all in one go try to
Users
Link to this page can be found on Hosting Control Panel Dashboard > Office 365 section.
The idea behind this page is to have a page where the customer can add, change or remove users on his Office 365. Also, assigning/deassigning licences to users is possible on change/add sub-page.
Before being able to manage users, you’ll need to first buy at least one of the Office 365 subscriptions.
The Domain part of the email is populated by a list of the verified domains present on customer’s Office 365. Domains can be added and verified manually (on Microsoft Office portal) or on Domains page in Atomia. If added in Atomia, the process of verification is a lot easier, since records needed for verification are added automatically. Please note that only verified domains are going to appear in the list for domains as last part of the email.
The admin user is added to your Customer’s account automatically when Microsoft Customer has been created (when the first purchase of Office 365 or Azure subscription is successfully provisioned). The initial password used for login to the Office portal can be found in the welcome email that Atomia customer should receive. If you have access to the Atomia test client, you can also see Initial password in MsCSPCustomer service.
Updating Microsoft Refresh Token
For purpose of updating refresh token from Atomia directly in Admin Panel > Settings > Dynamic Resources you can find table with list of all Refresh tokens for each reselers resource.
If administrator or reseller wants to update his refresh token he can do it by clicking on Refresh Token button for that resource in table which will do read username and password from resource and with those credentials will do redirection in background and fetch new Microsoft refresh token and update it in database. At the end it will display message about successfully updated token and refresh table or display error message.
For this to work reseller should change his resource description to contain dbOverrideList like this:
<bindings>
<moduleList>
<module name="Atomia.Provisioning.Modules.MsCSP.MsCSP" resourceAssignmentPolicy ="RoundRobin" />
</moduleList>
<resourceList>
<resource name="MsCSPOffice365Resource">
<property name="Username">[email protected]</property>
<property name="Password">password123</property>
<property name="AppId">someAppId</property>
<property name="ClientSecret">fhsdjfDFJSfdjsf</property>
<property name="MicrosoftLoginUrl">https://login.microsoftonline.com/common/oauth2/authorize</property>
<property name="RefreshToken">refreshtoken123</property>
<dbOverrideList name="Office365OverrideList">
<propertyListItem>RefreshToken</propertyListItem>
</dbOverrideList>
</resource>
</resourceList>
</bindings>
This way, properties that are in dbOverrideList will be read from database table resource_description_property_overrides in AtomiaProvisioning2 database and those values will be used when resource is fetched.